

I did not consider the possibility that the culprit was telegraphing the rattle somewhere other than the originating point, and after a fruitless search for the reason, I just gave up and decided to consult a few professional mechanics who, unfortunately, were as confused as I was.
One of them suggested the factory 4-speed shifter was probably going bad and most likely the cause of the rattling sound. So out came the old shifter and I got to spend $200+ buying a new one.
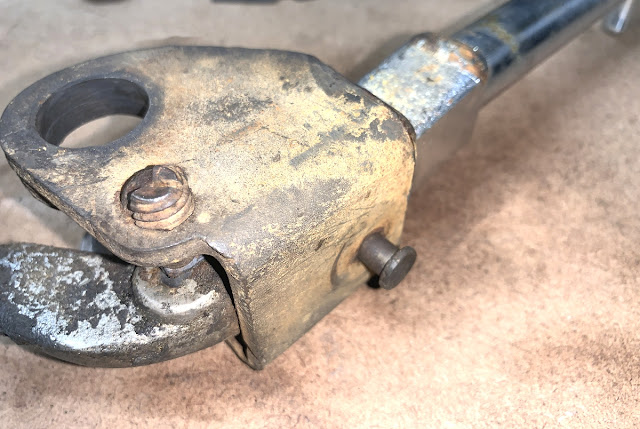
Once the "bad" original shifter was on the workbench (see photo), we inspected it and—after accumulating dirt for 40 years—it looked like it was ready to be replaced, even though my car at the time, only had approximately 44k original miles since rolling out of the Corvette Assembly Plant in St. Louis, MO.
Well, the 4-speed shifter had absolutely nothing to do with the rattle. The culprit was a missing $3.75 spring, ironically called the Clutch Fork Rod Anti-Rattle Spring.
To be fair, you cannot expect every mechanic to be familiar with every single car model ever made. Having said that, the one who recommended the shifter swap was a Corvette "expert."
I eventually found the answer to the rattling issue by reading comments of other C2 and C3 owners posted online.
If you would like more info about this spring and its installation, read the C3 Corvette Clutch Anti-Rattle Spring article I posted on January 1st., 2018.

The photo above shows the factory shifter after I gave it a good cleaning with some brake cleaner. It was also missing a snap ring and a cotter pin.

I decided to tear the whole assembly apart to give it a good cleaning since it still had remnants of old, dried-up grease.

But before I tore it apart, I took a bunch of photos since that always help with reassembly.


If you look closely at the three photos above, you can easily see the old grease caked onto the shifter levers.

And the photo above shows the levers once removed from the cage. It would be hard to assemble these pieces in the wrong order, but having them laid out as shown gives me a better understanding, especially when there's one thin part (bottom right of photo), that could be installed incorrectly.
An actual photograph is a thousand times more accurate than a mental picture.

And above you can see the gear selector which would also require a good scrubbing with a wire brush to remove all the dried-up grease and dirt.
Also, the set screw on one side of the selector had a tack weld to keep it from moving. I am not sure if that was done during manufacture or vehicle assembly but since the shifter worked fine before it was replaced, I decided to leave that alone.
I am guessing the set screw serves as a limit for lateral shifter travel.

And here are the levers and cage after a good cleaning with the wire brush and brake cleaner.

The shifter itself can also be taken apart and, as the picture above shows, it is secured with a clevis pin. Mine was missing the spring lock pin or a cotter key. I am not sure what held it in place originally.


Here's a close-up of the shifter clevis pin. If yours is in bad condition, you can easily find a brand new replacement at Ace Hardware, along with either a spring lock pin or a cotter key.

Removing the shifter knob and reverse lock assembly is a matter of twisting the knob counterclockwise so it can be removed, then simply lifting the reverse lock and spring.

These are all the components. And by the way, I had bought a bigger diameter plastic shifter knob when I bought the car, but eventually went back to the factory polished-metal knob. Either one looks fine.

After I cleaned all the pieces, I gave them a light buffing with Mother's Mag & Aluminum polish. I also made sure the clevis pin hole was clean and free of surface rust with a thin metal-bristle bottle-type brush.

The photo above shows all the shifter components after the first cleaning. Yes, I said "first" since I decided to go a step farther and give the levers and several other pieces a more in-depth cleaning.

Since I do not have a sand-blasting cabinet (or a compressor, for that matter), a few years ago I purchased a vibrating tumbler which is great for deep cleaning small parts.

I also bought a small jar of crushed glass 40/70 grit media, which is great for these types of small pieces. The tumbler originally came with Medium Ceramic Abravise Polishing media, which is just too large for cleaning small parts like these.
Anyway, I let the parts sit in the running tumbler for about 45 minutes.

And this is another shot of all the shifter components. At this point, I gave the levers and cages a final cleaning with a rag soaked in alcohol to get them ready for a few coats of paint.


I used Cast Blast Spray Paint which looks amazing since it has the right sheen that gives the parts that original, factory-fresh look.


After the paint was fully cured, I applied a generous coat of synthetic grease to all the components. The grease both lubricates all moving parts as well as protects the metal once some of the paint rubs off.

I did not have a snap ring for the lever/cage shaft, but an E-clip works just as well to keep the shaft in place.

I also used a cotter key to secure the shifter


And this is the finished product. I am not sure if I want to go through the trouble of reinstalling it back in the car since the one I bought from Eckler's works just fine. But even if I decide to sell it—which I might—it should work as intended for at least another 40 years.
You can also find a ton of helpful information in the Factory Assembly Manual.

 Thank you for following my '76 Vette Blog!
Product Links... (#sponsored)
• Clutch Fork Rod Anti-Rattle Spring
• Mothers Mag & Aluminum Polish | 10 oz.
• Cast Blast Spray Paint | Cast Iron Gray By Seymour
• 1976 Corvette Assembly Manual
• C2 and C3 Corvette Stock Manual Shifter Knob | Chrome (knob only)


The photo above shows the factory shifter after I gave it a good cleaning with some brake cleaner. It was also missing a snap ring and a cotter pin.
I decided to tear the whole assembly apart to give it a good cleaning since it still had remnants of old, dried-up grease.

But before I tore it apart, I took a bunch of photos since that always help with reassembly.


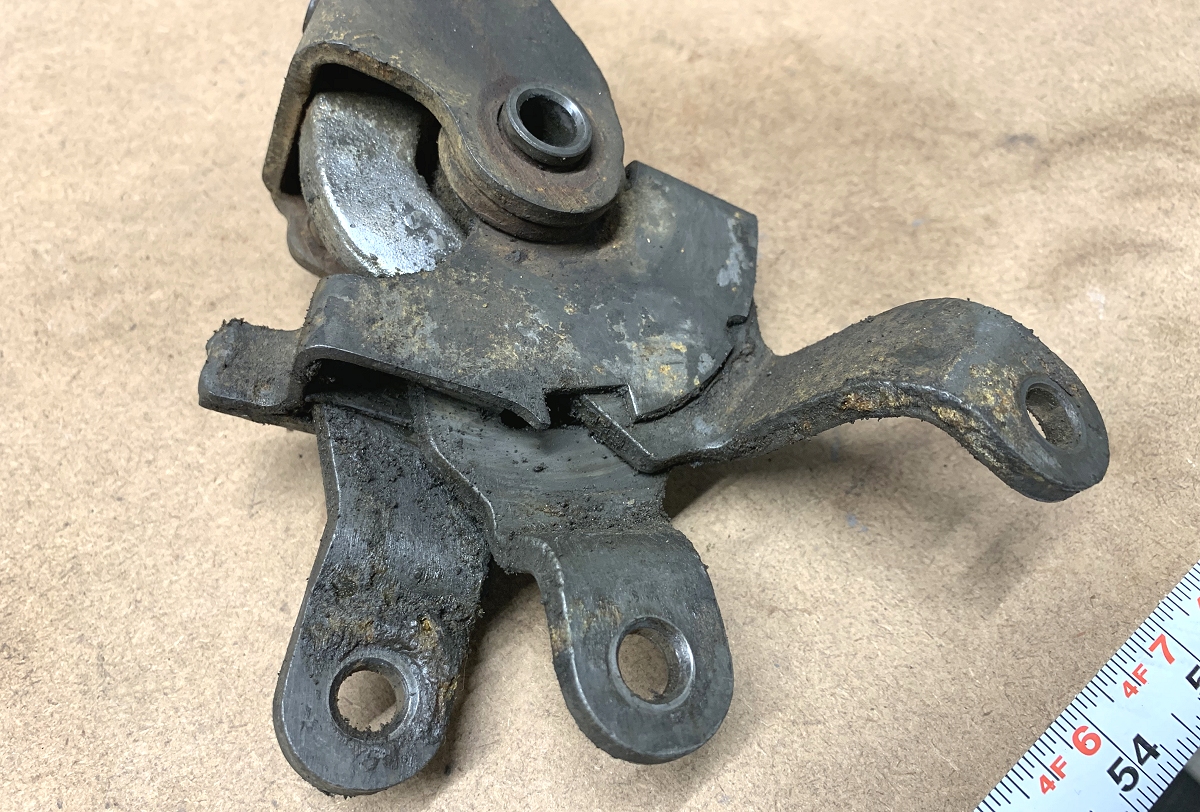
If you look closely at the three photos above, you can easily see the old grease caked onto the shifter levers.

And the photo above shows the levers once removed from the cage. It would be hard to assemble these pieces in the wrong order, but having them laid out as shown gives me a better understanding, especially when there's one thin part (bottom right of photo), that could be installed incorrectly.
An actual photograph is a thousand times more accurate than a mental picture.

And above you can see the gear selector which would also require a good scrubbing with a wire brush to remove all the dried-up grease and dirt.
Also, the set screw on one side of the selector had a tack weld to keep it from moving. I am not sure if that was done during manufacture or vehicle assembly but since the shifter worked fine before it was replaced, I decided to leave that alone.
I am guessing the set screw serves as a limit for lateral shifter travel.

And here are the levers and cage after a good cleaning with the wire brush and brake cleaner.

The shifter itself can also be taken apart and, as the picture above shows, it is secured with a clevis pin. Mine was missing the spring lock pin or a cotter key. I am not sure what held it in place originally.

The clevis pin was stuck pretty tight in there, but a few gentle taps with a hammer allowed me to remove it.

Once the clevis pin is out of the way, you can start removing the shifter base.

And as the photo above shows, it can only be removed in one direction. And if you haven't removed the shifter knob and reverse lock, this is a good time to do so.

Here's a close-up of the shifter clevis pin. If yours is in bad condition, you can easily find a brand new replacement at Ace Hardware, along with either a spring lock pin or a cotter key.

Removing the shifter knob and reverse lock assembly is a matter of twisting the knob counterclockwise so it can be removed, then simply lifting the reverse lock and spring.

These are all the components. And by the way, I had bought a bigger diameter plastic shifter knob when I bought the car, but eventually went back to the factory polished-metal knob. Either one looks fine.

After I cleaned all the pieces, I gave them a light buffing with Mother's Mag & Aluminum polish. I also made sure the clevis pin hole was clean and free of surface rust with a thin metal-bristle bottle-type brush.

The photo above shows all the shifter components after the first cleaning. Yes, I said "first" since I decided to go a step farther and give the levers and several other pieces a more in-depth cleaning.

Since I do not have a sand-blasting cabinet (or a compressor, for that matter), a few years ago I purchased a vibrating tumbler which is great for deep cleaning small parts.

I also bought a small jar of crushed glass 40/70 grit media, which is great for these types of small pieces. The tumbler originally came with Medium Ceramic Abravise Polishing media, which is just too large for cleaning small parts like these.
Anyway, I let the parts sit in the running tumbler for about 45 minutes.

And this is another shot of all the shifter components. At this point, I gave the levers and cages a final cleaning with a rag soaked in alcohol to get them ready for a few coats of paint.


I used Cast Blast Spray Paint which looks amazing since it has the right sheen that gives the parts that original, factory-fresh look.


After the paint was fully cured, I applied a generous coat of synthetic grease to all the components. The grease both lubricates all moving parts as well as protects the metal once some of the paint rubs off.

I did not have a snap ring for the lever/cage shaft, but an E-clip works just as well to keep the shaft in place.

I also used a cotter key to secure the shifter

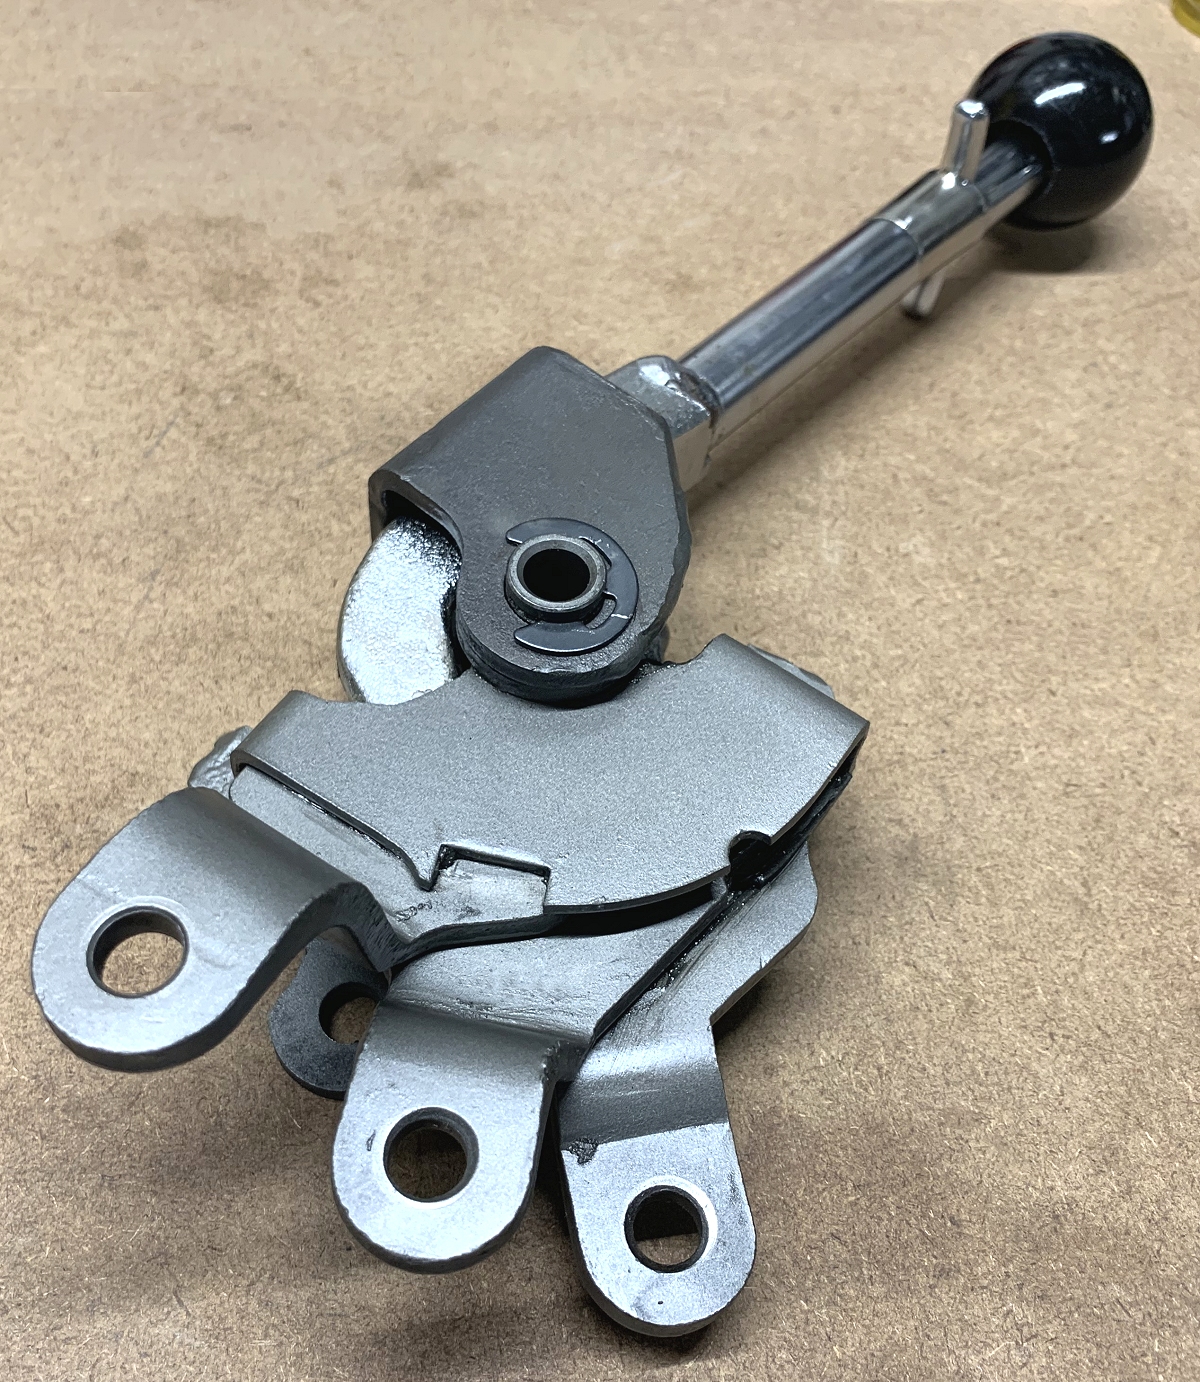
And this is the finished product. I am not sure if I want to go through the trouble of reinstalling it back in the car since the one I bought from Eckler's works just fine. But even if I decide to sell it—which I might—it should work as intended for at least another 40 years.
You can also find a ton of helpful information in the Factory Assembly Manual.


Product Links... (#sponsored)
• Clutch Fork Rod Anti-Rattle Spring
• Mothers Mag & Aluminum Polish | 10 oz.
• Cast Blast Spray Paint | Cast Iron Gray By Seymour
• 1976 Corvette Assembly Manual
• C2 and C3 Corvette Stock Manual Shifter Knob | Chrome (knob only)