
 |
| Above: My 76 Vette at home. |
In my particular case, having a one-car garage makes the task a lot easier as well as affordable, compared to two- or three-car garages.
But after painting walls and floors, adding toolboxes and workbenches, improving the lighting and adding outlets everywhere, as well as posters and decorations, there is one area that most will ignore and that is the garage door itself, which is odd since it takes up a whole wall!
But somehow it's ignored, sort of like old wallpaper. You know it's there but you don't really care.
Mine was no exception, but since replacing a garage door can cost a significant amount of money, I decided to try to make the existing door last for as long as possible. This required some mild "bodywork" and a few repairs.
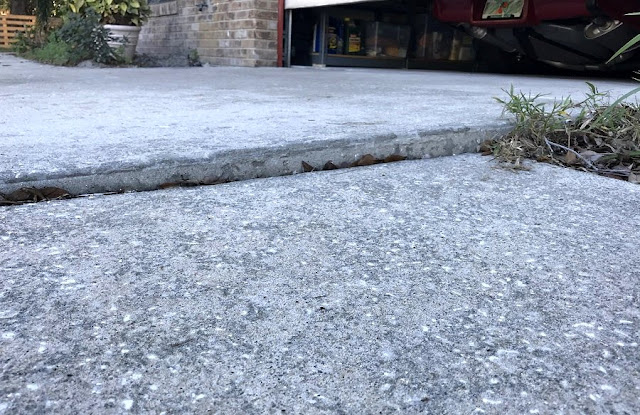
The door worked just fine, but it was missing the bottom seal and it was not sitting flush on the concrete. Unfortunately, when they built the house back in the early 1980s, they failed to remove a few tree stumps and, after thirty-plus years, those roots—as they continued to grow—started cracking and lifting the driveway pad closest to the garage door, which created a whole bunch of problems.
The only solution was to tear and remove the old pad and pour fresh concrete after digging out all tree remnants.
 |
| Above: Cracks and an uneven surface are usually the results of underground tree roots. |
 |
| Above: Only a small portion of the original driveway lined up with the garage floor. |
 |
| Above: The root system under this portion of the driveway was massive. |
 |
| Above: Extending the driveway an additional 7 feet was the obvious choice. |
I took this opportunity to widen the driveway for comfort as well as additional parking and a crew showed up the day after Christmas to do the job. Luckily, they did the teardown, removal of old concrete, forming, and pouring the same day.
 |
| Above: At some point in the future the rest of the driveway will have to be addressed. |
 |
| Above: It will now be possible to park two vehicles side-by-side in the driveway. |
Once the concrete had cured for several days—so it was okay to walk on it—I tackled the garage door seals as well as the insulation panel project.
Garage doors made out of steel or aluminum offer little if any protection against cold or hot temperatures, which makes working in the garage difficult at best. But energy-efficient doors cost thousands of dollars, plus the cost of the installation, not to mention the inconvenience.
 |
| Above: New bottom edge door seal. |
He said that in spite of age and a few dings, the unit itself was in good condition, as were the opener, spring, and tracks.
His recommendation was to fix the driveway first and then add new seals. Surprisingly, he did not charge me for the advice.
A visit to Lowe's provided a new bottom seal and I also purchased a box of self-drilling screws to secure it to the bottom of the door. This project was quite simple and all I needed was someone to help me hold the seal in place as I secured the first couple of screws with my cordless drill.
I followed that project by installing the side seals, which I nailed to the trim. The weatherstripping kit included the right nails for the job and I spaced them every 4 inches to ensure a tight seal.
I operated the garage door up and down a few times in order to visually confirm that the seals covered the door completely and were flush when in the closed position. They did.
 |
| Above: New weatherstripping and an even driveway allow for a tight seal. |
 |
| Above: Exterior caulking will help keep bugs and water outside. |
With that project completed, I took the time to apply outdoor caulk to the areas where the door trim meets the stucco. I laid a generous layer in order to keep the whole area weathertight. A few days later I added a trim piece to the whole area to conceal the nailheads and give the edges a finished look.
 |
| Above: I've always wanted one of these! |
Then, a week or so later, I saw a Lowe's ad on Facebook for a 300-piece Kobalt toolset.
Long story short, after discounts and with the help of a coupon, I only paid $140 for the whole set which brought the cost of each piece to under 50 cents. In addition to that, the set came neatly organized with trays that fit the drawers of my Kobalt toolbox perfectly!
I had to buy one.
What can I tell you? It's one of the best purchases I've ever made when it comes to tools.
 |
| Above: Score of the year! 300-piece Kobalt toolset for $140 after discounts. |
 |
| Above: Yes, the tool trays came with the set and they are a perfect fit in the drawers. |
 |
| Above: A few of the tools in this drawer are worth the $140 I paid for the whole set! |
 |
| Above: Metric and SAE sockets, all neatly organized. |
 |
| Above: Sockets also come in 1/4", 3/8" and 1/2" sizes. |
 |
| Above: Deep sockets were also included in this toolset. |
With such a level of organization, I was motivated to keep going and decided to tackle a few more projects I'd thrown on the back burner.
 |
| Above: Great way to store these bins. |
Since one of the bins is used exclusively for plastic recycling (meaning the contents usually weigh close to nothing), I screwed three hangers I made out of wood shims to the wall.
The bottom bin is for paper recyclables, and since that one can get pretty heavy, I store that one on the floor, while the one for plastics hangs right above it.
I am pretty proud of that idea and how well it has worked so far.
Like you, I also keep a few small parts organizers around the shop, and one of them was looking tired and ready for the recycling pile.
However, I decided to give it a new lease on life by painting it black. It looks new again and matches the other organizer.
 |
| Above: This old small parts organizer had seen better days. |
 |
| Above: A few coats of SEM black paint brought it back to life. |
 |
| Above: The organizers look great. The countertop not so much! |
Of course, at this point, the workbench countertop was looking totally out of place and something had to be done about it.

You rarely find something that is the perfect size for a project, and the Easy Liner was no exception being wider than my workbench, but it was easily cut down to size with a straight edge and a sharp snap-off blade utility knife.
I purposely chose not to glue it to the workbench so I can flip it over—or replace it—when necessary.
And the black finish looks great in the workshop, plus it has a very nice soft texturized finish that makes the countertop look great.
 |
| Above: The workbench countertop looked unfinished and just plain dirty. |
 |
| Above: A layer of Easy Liner cut to size gave the countertop a finished look. |
I also had a couple of sets of small yellow storage bins that are designed to be hung on the wall and also are removable. I guess the idea is to make them portable so you can have them close to you as you work on a project so you don't have to walk back and forth to where they're located.
Well, in my case I've never used them like that and they tend to fit (and look) a bit sloppy once you place a few items in them. Plus I guess my OCD was acting up that day so I used Crazy Glue to secure them to each other so they would all line up nicely. Masking tape helped ensure they would stay aligned as the glue cured.
 |
| Above: Laugh all you want, but my yellow bins are all aligned perfectly, and they look great. |
 |
| Above: Paper towel holder by Pit Pal. |
Boom! Now, this thing is serving its purpose since I placed it right by the utility sink.
It also has an area right under the paper towel holder that allows me to keep a box of Nitrile gloves handy, in addition to a small shelf at the very top for bottles of cleaners, soap bars, etc.
And before I forget, there was yet another contraption taking up floor space. I had built a rack years ago to hold these shallow small parts organizers made out of clear plastic, and since it kept all of the containers in one place, it sort of followed me to every place I've lived, and it's been a very handy little helper.
But like many other things, it ended up hogging floor space and that was unacceptable in my small garage. So I found a way to get it to fit in one of the bottom shelves and secured it in place with a couple of screws. And now it has a permanent home, it's easy to reach, and it's out of my way.
 |
| Above: Another item relocated from the floor to a better location. |
 |
| Above: Corvette Summer movie poster. |
In my case, as the accompanying photo shows, I used the backside of the side garage door to hung a copy of the movie poster that made me fall in love with C3 Corvettes.
Yes, it was a long time ago and I guess I was an impressionable 17-year-old, but when I saw this custom Corvette being built by a bunch of kids during shop class (according to the movie storyline, anyway), I became enamored with the lines of the car, as well as Annie Potts' curves... but I digress.
By today's standards, the car looks cartoonish to some if not most car aficionados, but in 1978 this thing was the kind of custom that car dreams were made of. That red metal flake paint was out of this world and Annie Potts was stunning.
She also drove a cool custom Chevy van, if memory serves. Sorry, I keep getting off-topic here.
But this little trip down Memory Lane brings me back full circle to the garage door.
If there's one project I've been wanting to do for quite a while now, it is to insulate a garage door. And even though I've lived in four different homes over the past thirty or so years, I did not insulate any of them.
It took house number five for me to get around to it!
 |
| Above: Your typical uninsulated metal garage door. |
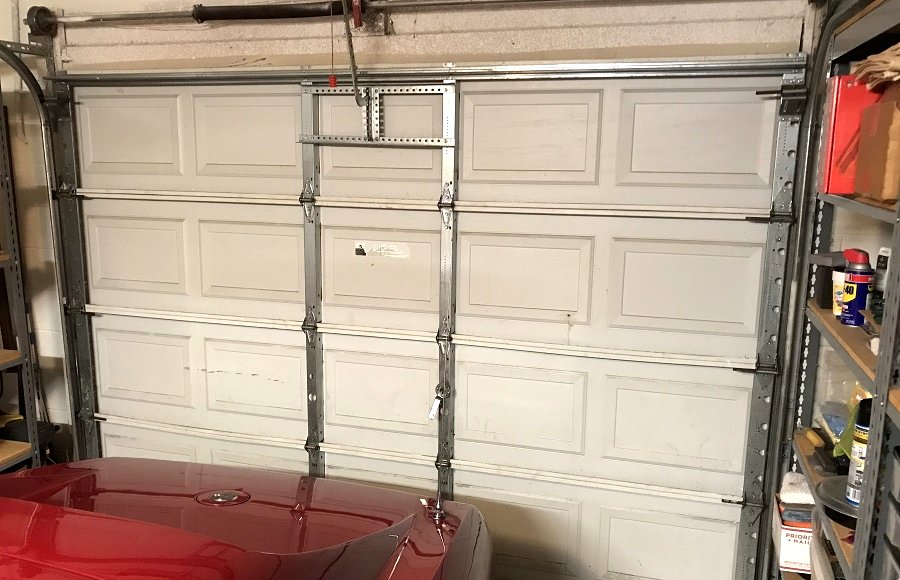
A thin metal garage door does little to keep noise and cold or hot temps out of the garage. There are insulation kits available, but since my door is an odd size (10.5' x 7'), I chose to make my own panels. Besides, why would I spend a couple of hundred dollars for something I can make myself for under $50?
Another trip to the Orange City Lowe's yielded two huge sheets of 2-inch-thick insulation board. The panels are light since they're nothing more than dense styrofoam boards covered with a thin layer of aluminum foil.
With notes in hand, since I had measured my garage door panels beforehand, I asked one of the Lowe's associates if he could cut the sheets down to size, and he did. It took all of 10 minutes and—after paying for them (there was no charge for the cutting part)— I brought home every scrap of the leftover board just in case, and I'm glad I did since I had to use some of them to get the job done.
 |
| Above: Lowe's will cut large panels to whatever size you need. All you have to do is ask! |
 |
| Above: I brought home every single piece of insulation board, which proved to be a smart move. |
I had to cut a few of them to size but it was easy to do with a sharp snap-off blade utility knife. And even though they fit pretty snuggly in the door panes, I taped all the edges with A/C duct aluminum tape. A little insurance never hurts.
 |
| Above: A new snap-off blade and straightedge will allow you to trim styrofoam boards to size easily. |
 |
| Above: I also used A/C duct aluminum tape to ensure the boards would remain in place. |
 |
| Above: And here's the finished product. I used a few pieces of scrap board to seal the smaller panes. |
I spent approximately four hours getting this job done and, I have to admit, it was a bit of a PITA, but well worth the time, money, and trouble.

The insulation has certainly quieted down the road noise tremendously, and so far it seems to be helping keep at bay some of the cold weather we've been having here in Central Florida.
Having said that, I don't expect this bit of insulation to cool the garage down once the Florida heat returns, but if it helps lower the ambient temperature even by 5 degrees, I'd be one happy guy. Only time will tell, but I'm glad I (finally) insulated my garage door. Even if it took me close to 30 years to do so!
Thank you for following my '76 Vette Blog.

• Corvette Summer Movie Poster | 27x40 inches
• Plastic Storage Stacking AkroBins | Yellow (6-Pack)
• Easy Liner Solid Grip | 20" wide x 6 feet long
• SEM Landau Black Color Coat Paint #15013
• Pit Pal Universal 3-Shelf and Paper Towel Dispenser