|
| Above: Keep Your GM Car All GM. |
Copper (or conventional) plugs, as they're usually referred to, use a copper electrode coated with a nickel alloy which, unfortunately, is not durable. This means that the spark plugs will need to be replaced more frequently.
Fortunately, copper plugs are cheap so replacing them every year or 12,000 miles, is an easy decision. The task of replacing them, however, will be a bit more involved.
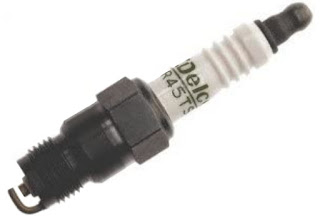
I have no idea if platinum spark plugs are a good idea when it comes to vehicles engineered to use copper plugs. It does sound like a sensible upgrade but I am not recommending it. My 1976 Corvette runs fine with ACDelco R-45TS spark plugs which are OEM plugs for these cars.
 |
| Above: 1976 Corvette owner's manual. I added the yellow highlight. |
To replace the C3 Corvette spark plugs, first, you will need to get to them, and how you achieve that task will be in part determined by accessories and/or aftermarket parts such as headers, for example.
You basically have two options: One is to remove and install all the plugs from the top. And two is a combination of top and bottom, both for removing and installing spark plugs. Every case is different, so you will have to choose the one that works best for you based on ease of access as well as the equipment you have at your disposal.
And having a floor jack, as well as jack stands, is mandatory if you plan to crawl under your vehicle.
TOOLS OF THE TRADE

Yes, you could use a deep-well 5/8" socket, but by doing so you risk damaging the plug's porcelain and a conventional socket will not have the rubber liner that holds the spark plug in place which not only helps protect the porcelain but also makes installation and removal a lot easier.
A spark plug gap gauge tool is also necessary. They are very affordable and a must-have.
R45TS plugs come with a 0.044" gap out of the box, and the recommended gap by GM is 0.045" for vehicles with HEI (High Energy Ignition) distributors, so I am sure they would work fine without any adjustments. Even so, I adjusted mine to the 0.045" gap since it only takes a few seconds.
And even though spark plugs come pre-gapped from the manufacturer, it is always a good idea to double-check those measurements. A lot can happen during the long journey from the factory to your garage, so always verify the gaps are correct. If you have any doubts about this, watch the video at the end of this article.
 |
| Above: The Emission Control decal shows the recommended spark plug gap. |
REMOVING THE OLD SPARK PLUGS
I started by removing the plugs from the left side of the engine—numbered 1, 3, 5, and 7—and except for number 5, they all looked pretty good for spark plugs with over 20K miles of service.
 |
| Above: I numbered each plug for reference. |
 |
| Above: Plugs 1 and 7 after 20K miles. |
The plug boot on number five had split longways in the portion that covers the porcelain. It is doubtful this caused the plug's carbon buildup, especially after I measured the gap and discovered that spark plug number five was off by a couple thousands of an inch.
The factory-recommended gap is .045" and this one barely registered .041". That discrepancy may not sound like much, but it made a world of difference.

 |
| Above: I am sure this plug produced a very weak spark. |
Since I was on a roll, I decided to see if I would be able to remove all spark plugs from above, so I tackled the right side of the engine.
The area where the a/c compressor sits was a bit of a challenge, but I was surprised to be able to reach and, somewhat easily, remove spark plugs 2, 4, 6, and 8. Luckily this time all the boots were in fine condition.
Once I had the plugs on the bench, I inspected them and, again, one of them looked far worse than the others. It was number 6 shown in the photos below.


As shown above, the gap on this one was .043" which, again, does not sound like a lot but the condition of the plug speaks for itself.
INSTALLING NEW SPARK PLUGS
With my new set of sparks plugs in hand, I started by first measuring the gaps to ensure they were all correct. I also made slight adjustments so they would be at the factory-recommended .045" instead of the .044" preset.
And it's a good thing I checked since whoever packed the plugs at the Amazon warehouse, simply tossed them in a box without any additional padding. All of the plugs were off by a couple of thousands of an inch or more in two or three cases.
This is why you should never install spark plugs without first ensuring the gaps are set correctly.
 |
| Above: The first new plug I checked had a gap of around .020" which was totally wrong. |
 |
| Above: New versus used. Which one do you think will perform better? |
As far as the spark plug boot that was damaged, I was able to glue it back together with cyanoacrylate glue (a.k.a. super glue) and a spray-on activator, plus a cable tie for good measure. This is a temporary fix but it worked fine.

A video helps illustrate each step better, so I filmed most of the steps involved, starting with removing the old spark plugs, then inspecting, gapping, and prepping the new plugs before final installation.

Again, removing and installing spark plugs is not a lot of fun, but very important and necessary if you want your C3 Corvette to run properly.
I consider this job suitable for do-it-yourselfers who have the right tools for the task. The important thing is to be patient and work on one spark plug at a time. Once you learn what's involved by doing, the process will become easier.
This job can be completed, from start to finish, in less than four hours.
I hope you found this article helpful as well as informative.
Thank you for following my '76 Vette Blog!
Product Links... (#sponsored)