

So I had two options:
- Buy a reproduction liner (about $30 plus shipping)
- Make my own glovebox liner (about $8)
I chose option number two!
If you are good with your hands, you can easily make one that is as good, if not better, than the original. Even if you want to include the glovebox light shield as equipped from the factory.
Since I would like to use an LED light strip for this purpose, I simply eliminated the factory light which made my life a lot easier. By the way, the two aftermarket reproduction glovebox liners I saw advertised online had flat sides. In other words, they had no provision for the factory light.
MAKING A TEMPLATE
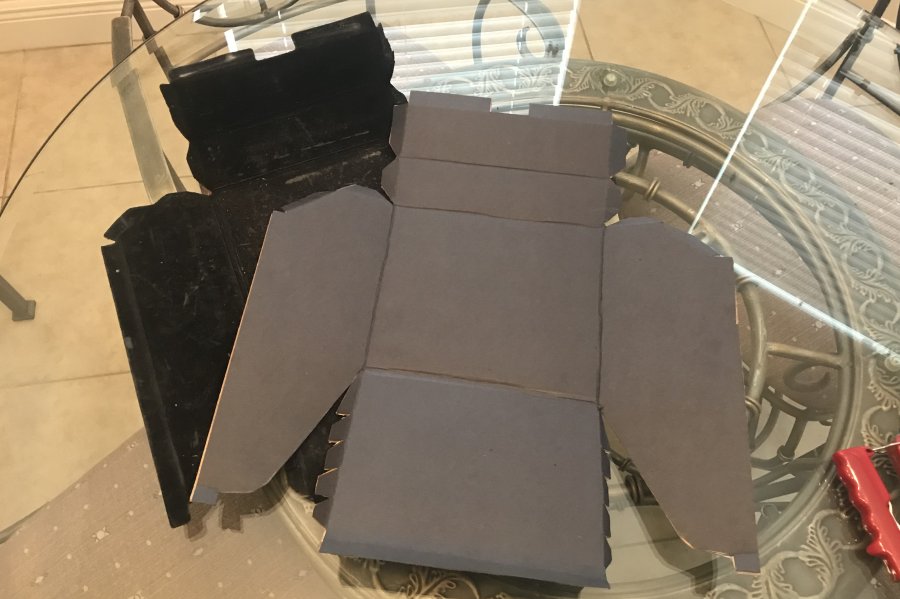
I started by taking the old liner apart in order to have a guide to make a paper template of the piece. The liner is held together by metal staples which were a bit of a pain to remove.

As the photo above shows, the liner had a gaping hole and it came apart in a couple of pieces. Plus you can see how bad the flocking looks from years of regular use.
I patched the piece together so I could make a paper template.

I simply taped together six 8x11 sheets of paper a little larger than the liner. This allowed me to draw its outline with a pencil.
CUTTING THE PIECES

I then cut around the outline with scissors and I also used a long ruler along with a sharp snap-blade knife where long straight cuts were necessary.


The local crafts store had large pieces of corrugated cardboard on sale for $1.50 as well as a black poster board for around $6.50 per sheet. I traced the template outline onto both cardboard pieces and carefully cut them with the snap-blade knife.

Folding the poster board sheet was not a problem, but folding corrugated cardboard is a bit trickier.
Thankfully, I had a cardboard scoring tool. This tool makes tiny perforations on the corrugated cardboard which allows you to make nice sharp and straight folds.
I used the original liner as a guide to determine where and how the folds were made. I also used a metal ruler to ensure the perforated lines would be in a straight line.


I then folded the corrugated cardboard along the perforations based on the original piece. And I did the same for the poster board.
ASSEMBLING THE NEW GLOVEBOX LINER
I chose to use contact cement to bond the corrugated cardboard and poster board. This gave me a bit of flexibility as I made the necessary folds. Since the contact cement had not completely cured, as I folded the new liner, the cardboard pieces I made shifted just enough to allow for the folds. This worked perfectly.

I used the wooden roller shown above, to make sure there would be no voids in the liner.
I thought about gluing a piece of black felt fabric for a more OEM look but decided against it. You only get to see inside the glovebox when you open the door and the slick surface looks just fine.

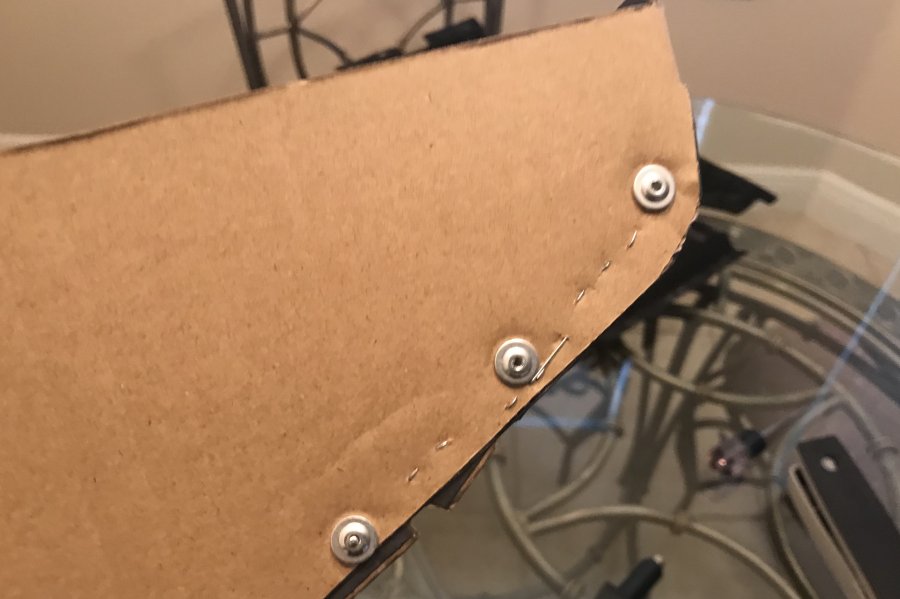
When the time came to put the new glovebox liner together, I used regular staples to hold things in place, then poked holes with an awl, followed by 1/8" aluminum rivets and aluminum washers. The rivets add strength and the washers keep them from tearing the cardboard.


The three photos above show the completed glovebox liner, ready to be reinstalled in the storage compartment assembly.
INSTALLING THE NEW GLOVEBOX LINER
I did have to make a few adjustments to the liner since the fit is tight, and parts of the cardboard acted as a gasket between the storage compartment frame and the body area where it was to be attached.
Remember that carpeting may also fit between the frame and body, so adding yet another layer of anything will not allow a proper fit.

After removing the storage compartment framework, which includes the trim and doors, I placed it upside down in order to fit the glove box liner.

Other than that, they serve no additional purpose since the glovebox liner is sandwiched between the framework and the tunnel under it.
And a tight fit it is.
I had to remove the whole assembly a couple of times in order to trim the liner here and there to ensure a good fit.

The photo above shows one of the retainers in place. And once they bite into the cardboard they'll stay in place. Once you place the liner in the frame channel, you secure it by pushing it in place.

Above: Glovebox liner positioned in the storage compartment frame. I did eliminate the two rivets at the very end of the liner and also trimmed the cardboard overlap as it caused fitment issues.

Liner reinstalled and serving duty as a glovebox. As I mentioned previously, I deleted the light and may install an LED strip light in its place in the future.

The photo above shows the storage compartments with all doors closed. Notice how the edges overlap the carpet for a clean look.
I hope this article is of assistance if you decide to fabricate your own glovebox liner or install a new one.
Thank you for following my '76 Vette Blog!
Product Links... (#sponsored)
• Wheel Tool Roulette: Paper Crafts, Leather, Sewing, more...
• How to Restore Your C3 Corvette: 1968-1982
• 1968-1982 Corvette Restoration Guide, 2nd Edition
• 1976 Corvette Assembly Manual
• 1968-1977 Corvette Glove Box Assembly With Lens And Bezel
