

The good news is that you will not need a lift to do this job. I had lifted my car with the QuickJack but it made things worse as I was unable to comfortably reach the nuts on the top edge.
The bumper cover is held securely in place by eighteen nuts that sandwich the skin to the body via retainer strips with studs attached to them.

It took me roughly one hour to remove all the nuts and there was no way to spray anything on the studs at the top edge in order to make this task easier.
I was fortunate that all eighteen came out without much of a fight, although after 40+ years the exposed stud threads had enough surface rust which slowed down the process.


The license plate light will have to be removed or at least unplugged. Since I want to clean and repaint the assembly, and also clean the screws and washers, I chose the former.

And speaking of license plates...
You will need to remove the license plate to gain access to the three bolts that secure the bottom center of the cover to the bumper itself.
When all of the above steps are complete, you can carefully start separating the bumper cover from the body.
As a side observation, notice how rough and dull the paint is in this area. Not sure why they didn't pay better attention when the car was repainted, so I'm assuming it was a budget job. Strange though, because from the old Polaroids® the previous owner gave me, they did remove the doors to paint the door jambs.


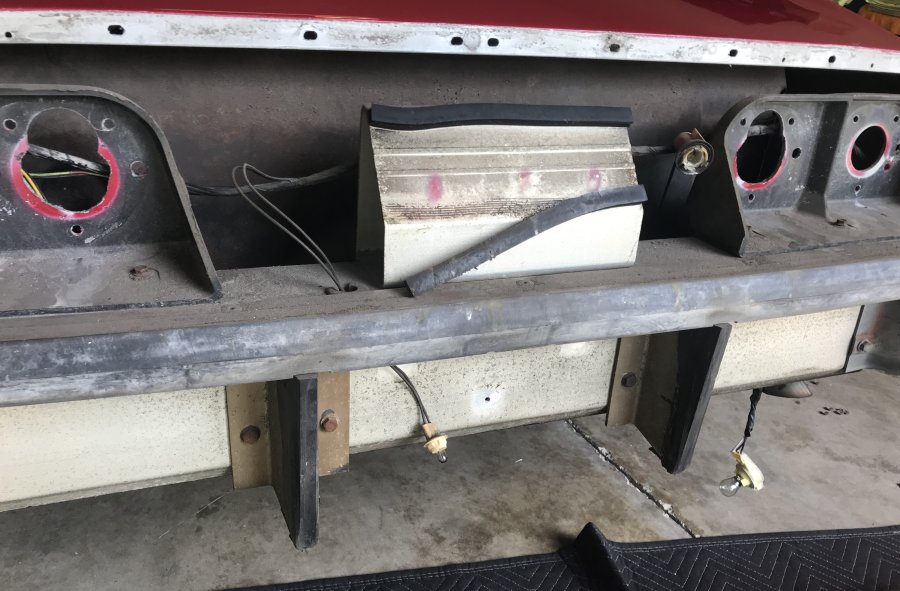
Additional proof of the color-change repaint as you can see the original Metallic Silver paint on the body flange, which shows that whoever painted the car chose to do so with the cover in place.
Once the cover is off of the car, you can set it in a safe area to protect the paint. And even though mine will be repainted, I still exercised caution to avoid additional damage.
The three photos below show the dirt accumulated over four decades. Needless to say, I detailed the whole area and brushed Loctite's Rust Neutralizer wherever I saw surface rust. This product turns rust into a black, paintable surface. I will not paint mine, but neutralizing the rust ensures a longer life for the treated metal.


I am working on another post covering the complete detailing procedure of the rear bumper area that hides behind the bumper cover, so stay tuned for that article.
Thank you for following my '76 Vette Blog!
Product Links... (#sponsored)
 • Corvette Bubble Taillight Conversion Kit
• 1976 Corvette Service Manual
• 1976 Corvette Assembly Manual
• Loctite Extend Rust Neutralizer
• Rust-Oleum Rubberized Undercoating
• Red Auto-Mechanic Shop Towels
• How to Restore Your Corvette: 68-82
• 1968-1982 Corvette Restoration Guide